by
by Hi friends in this article I will show you step by step how to fix the loud CPU fan noise using BIOS settings without reducing CPU performance.

The Main Problem
Recently I built my first PC using an AMD Ryzen 3rd Gen 3700X CPU. It is performing superbly but there is a minor issue. The free stock Wraith Prism CPU cooler cools the CPU quickly, but the amount of noise it generates at 100% power is very loud. To make things worse the AMD CPU configures the BIOS to run the FAN at 100% power even when the CPU load is not high. So the result is when you open a little CPU demanding programs like Chrome the FAN starts spinning at 100% power for few seconds and then goes to normal. This causes a lot of distraction and annoyance as it keeps happing again and again when you do small things in your system.
The Problem with Other Fixes of CPU Fan Noise…
I searched online regarding this problem and found on several forums people are complaining about this issue. The solutions found online to fix this issue involved reducing the maximum throughput of the CPU by changing the windows power settings. This did cause the fan noise to reduce . But this meant your CPU will now not work to its full potential.
My Fix To Address CPU Fan Noise
So I tried to find an alternative method. Which will get rid of the annoying repeated buzzes of the fan without compromising on CPU performance. To achieve this I directed my effort in addressing the core problem. That is the fan running at 100% power even with a small CPU load. Ultimately I was able to fix this problem by changing the BIOS settings for the CPU fan which controlled the fan speed based on CPU temps. I increased the threshold temperature for engaging the CPU fan at 100%. This caused the CPU fan to run at 100% only when a high load task is being done for more than 5 seconds like when rendering a video. The CPU now might run a little hotter than before but you need not worry as this is still well within the operating temrature range of the CPU. So now let see how to do this step by step.
Steps to Solve Loud CPU Fan Noise
1. Reboot your system and open the BIOS Settings
- Power on or Reboot your System If already on.
- Press the Delete key to launch BIOS Setup
- This varies by motherboard manufacturer for MSI it is the delete key.
- You can check this article to find the keyboard key for your BIOS.
2. Find the fan settings page in your BIOS settings
This also varies by motherboard brand the below steps are for my MSI motherboard you will have to search online in the documentation for your particular motherboard brand.
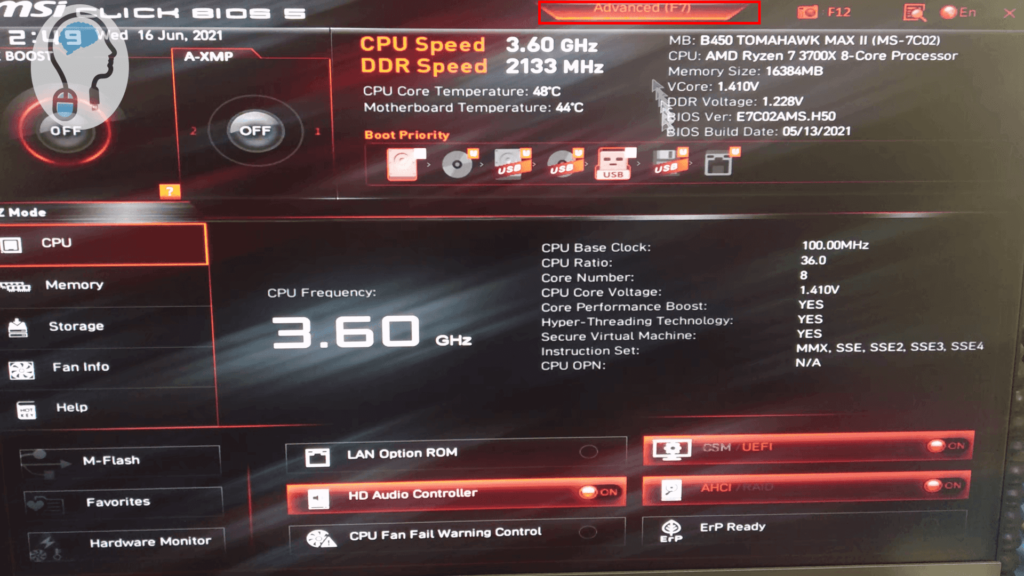
- Click on the advanced button as shown in the screenshot below or press the F7 key
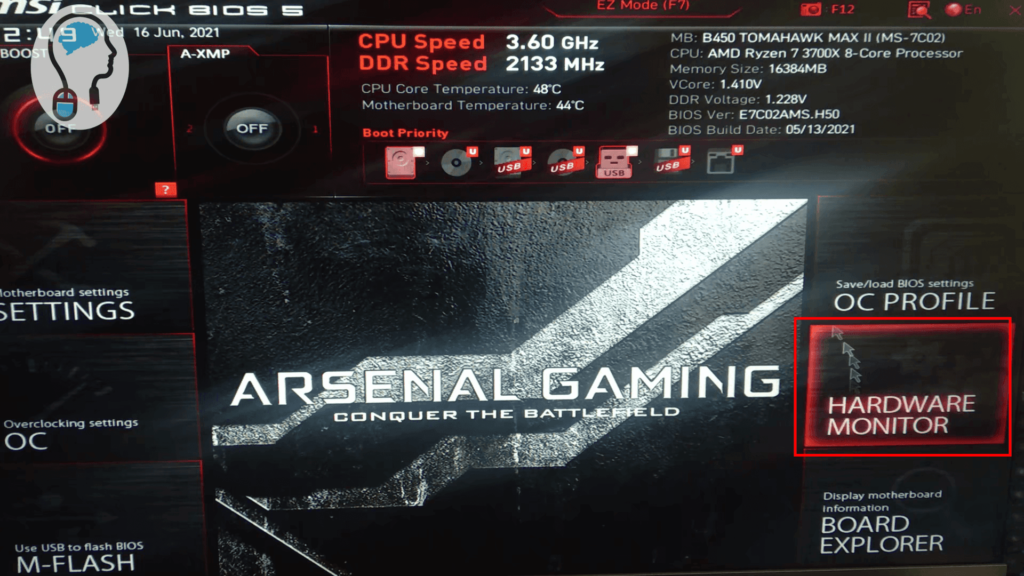
- In the advanced mode click on the Hardware Monitor option as shown below.
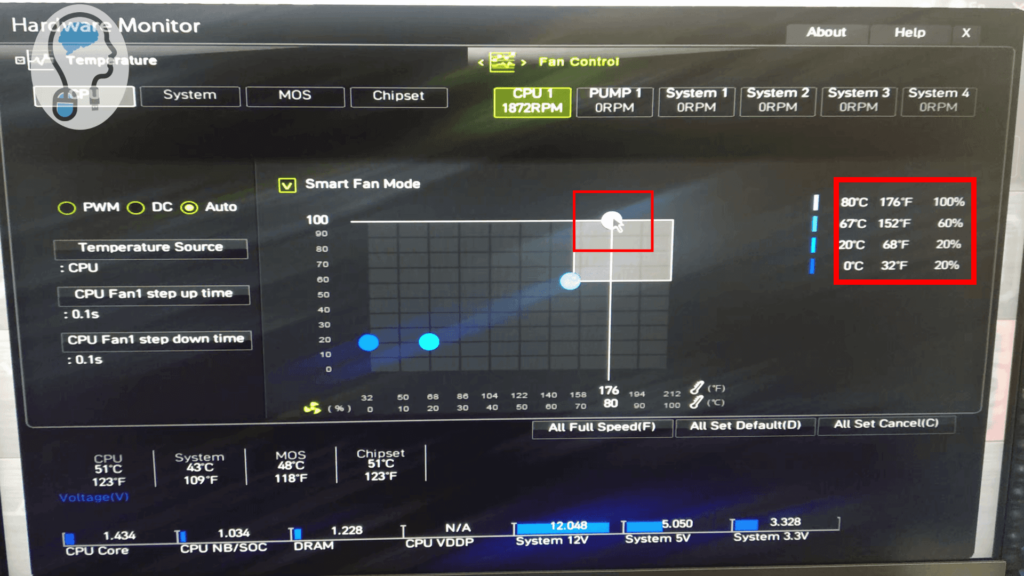
5. Modify the threshold temperatures for fan power
Based on the ambient temperature at your place. You will have to do some trial and error to find the best threshold temperatures for the different fan speeds.
- Start by using my threshold temperature configuration as shown below on the right-hand side of the screen
- To modify the fan configuration click on the point on the graph and drag and drop it based on the temperature and fan speed.
- The Y-axis corresponds to the fan speed percentage and the X-axis to the threshold temperature
4. Save BIOS Settings and Reboot your system
Once you have made all the change to your fan configuration don’t forget to save your BIOS settings. The steps for saving your BIOS settings also varies by BIOS brand so refer to your documentation. The below steps are for MSI motherboard.
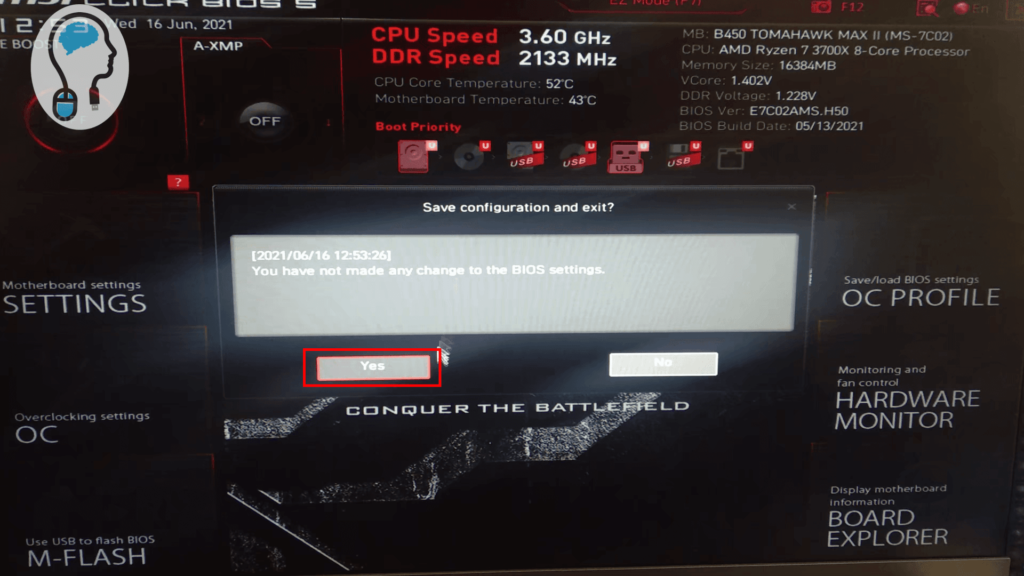
- Click on the cross button to close the hardware monitor and then again click on the cross button in the main BIOS screen
- Then a popup will show asking do you want to save the changes made to your BIOS click the Yes button and your system will reboot.
I hope friends, you liked this troubleshooting guide. Using this guide probably you were able to fix this problem in your system. That’s all for today friends Subscribe to our YouTube channel to get more such videos in the future. You can also Subscribe to our newsletters to get email alerts when we release new content. That is it for now friends, see you later bye.